This page will walk you through a few simple ways to take a decent photograph of a still-life setup using a camera phone or an automatic "point & shoot" camera. If you have a camera capable of shooting in RAW format with manual controls and want to learn how to take full advantage of it, click here for the Advanced Photography Guide.
If possible, I strongly recommend painting from life instead of from a photo. If you do intend to paint from photos, if possible, use the advanced guide instead.
The #1 problem with most photos is that they are overexposed. With a manual camera, you can adjust the settings so that the photo is exposed correctly, but because you're using an automatic camera, you will need to find another way to get a good exposure.
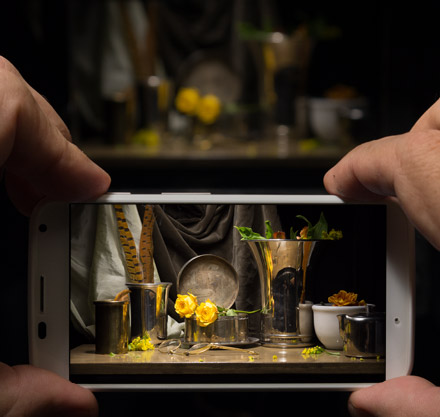
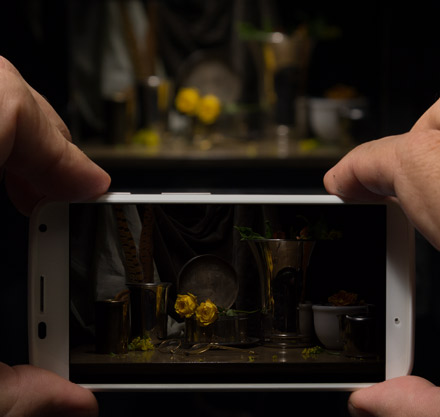
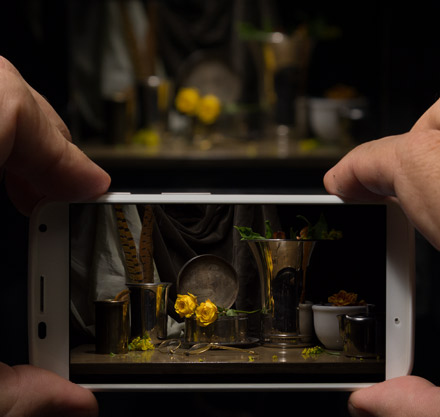
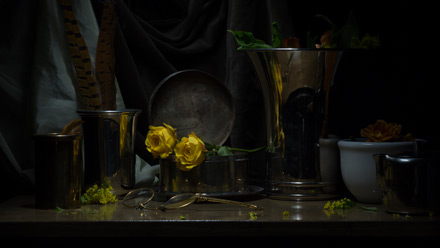
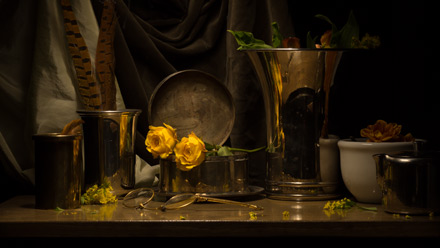
But first, what is a good exposure? Let's take a look at this still-life:

And now let's compare that to three exposures on this camera phone. The first one is overexposed (too bright), the second one is underexposed (too dark), and the third one is a good exposure.
Now that you have a better idea of what a good exposure is, how do you adjust the exposure when taking your photo? Below I will go over two simple methods you can use to adjust your exposure, and then at the bottom of the page I will go over some other important things you should be aware of. Please read all of it!
METHOD 1: Tricking Your Camera
When a camera tries to automatically determine how to expose a photo, it does so by analyzing the brightness of the scene. The camera is trying to determine how much light is in the scene — in other words, are you outside in bright sunlight, or are you in a dark room? If the camera didn't adjust the exposure for each scene, the dark room might end up all black in the photo, and the bright sunlit scene might end up all white. So the camera has to adjust to compensate.
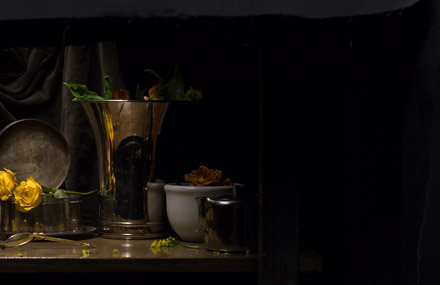
One of the problems with this is that a camera doesn't actually know what it's looking at. If you set up a still life with a big white object in it, the camera will automatically decide on a certain exposure. But then, if you leave the light in your still-life setup exactly the same, but switch the big white object out with a big black object, the camera will brighten the exposure to compensate, even though the exposure should be the same for both versions of the still life (because the amount of the light didn't change). In these two images I took with my camera's automatic mode, you can that the exposure is much brighter in the photo with the dark object.
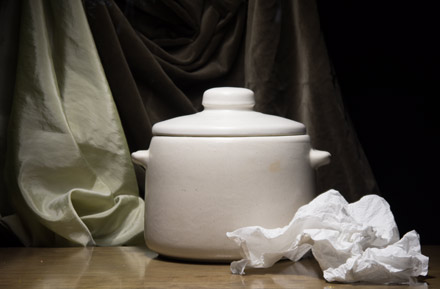
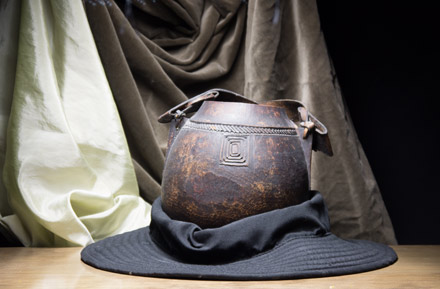
Neither of the exposures above is correct. They're both overexposed, especially the second image. The object is supposed to be dark because it is in fact a dark object in soft light, but the camera doesn't know this so it cranked the exposure up drastically.
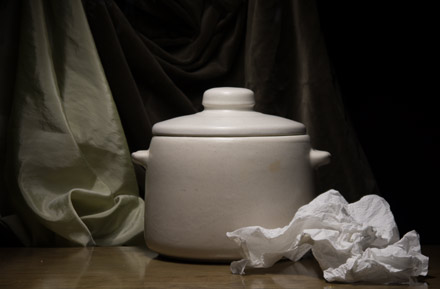
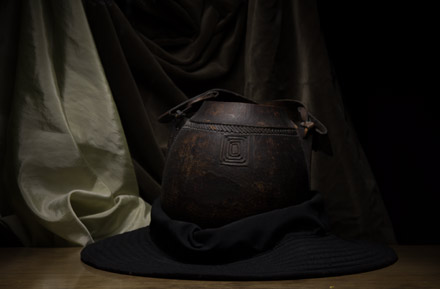
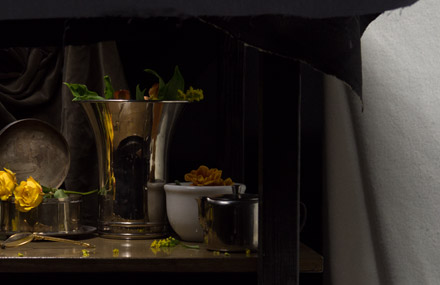
In the images below, you can see what the photos look like when exposed correctly. If you look at the backgrounds you can see I exposed them exactly the same amount. They probably look dark to you because you were just looking at the overexposed versions, but these are correct. Notice how the brightest color in these images, the top of the white pot and the bright parts of the crumpled paper towel, are not "blown out" to pure white.
When trying to pick out the correct exposure, I recommend starting with an exposure you know is very underexposed, even black, and slowly making the exposure brighter. If you start with an overexposed image (which most people do), you will tend to select an exposure that is too bright. This is something that even I have to be careful with.
So how can you trick the camera into changing the exposure without altering your still-life setup? It's very rare for a camera to select the correct exposure. In fact, most cameras will intentionally err on the side of overexposing photos, which if anything is the opposite of what you should do for the purposes of painting realism.
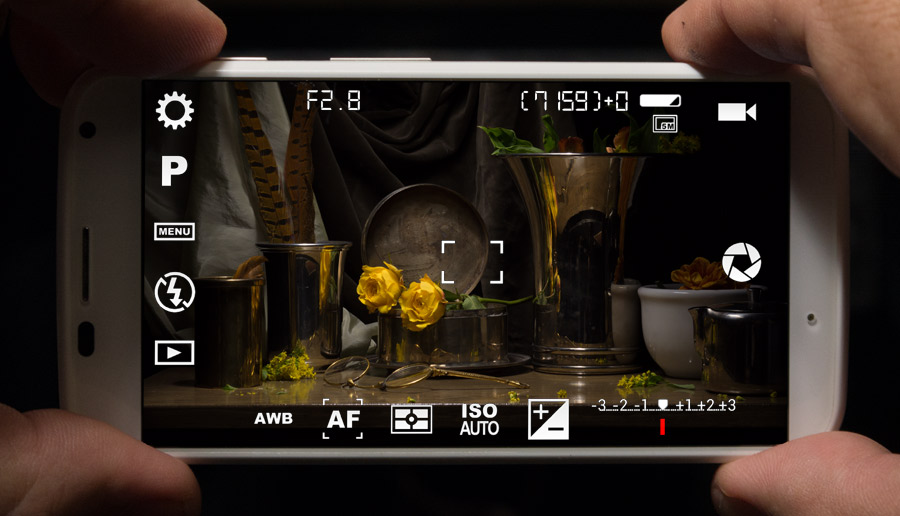
Here's the trick: by placing a large bright object just outside of the still-life setup, you can influence the camera's exposure without adjusting your still life itself. The way it works more or less is that the more of the object the camera can see, the more it will affect the exposure.
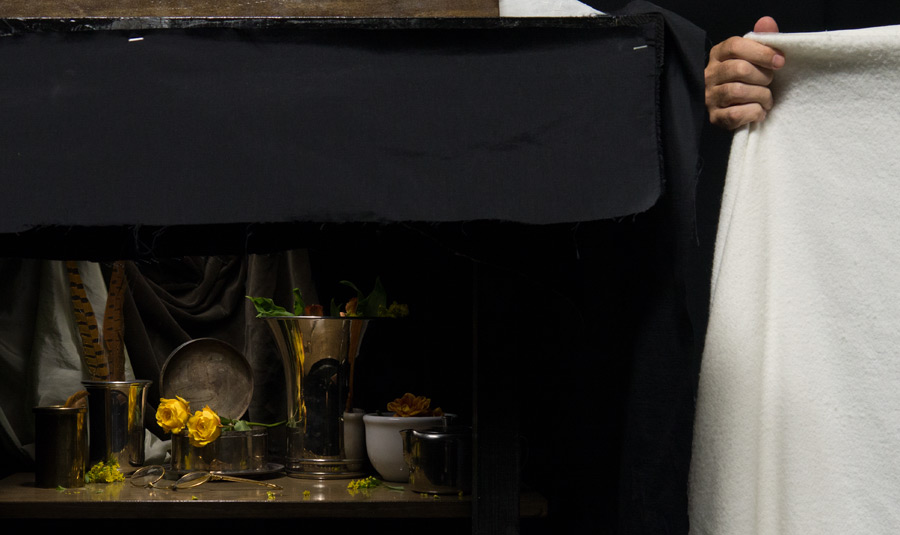
You have to be careful not to affect your still-life setup when you do this. If you're using a shadowbox, like I am in the above photo, it's easy to keep the "trick" object from affecting the still life because the shadowbox has black cloth on the sides, blocking any light coming from the sides. In these next two images I demonstrate what can happen if you're not using a shadowbox. The two images are exactly the same, except in the second image, I have removed the black cloth from the side of the shadowbox.
You can see how it changed my composition by adding reflections and casting more light on the right side of my objects. The shadow side of the little white bowl, for example, is considerably brighter without the black cloth blocking the light from the white blanket I'm holding up.
So if you're not using a shadowbox, you may need to block the "trick" object from the still-life setup. If you would like to use a shadowbox, instructions are provided on the Choosing Your Subject page of the Online Course.
So try including more or less of your bright object in the shot, depending on whether the exposure needs to be darker or brighter. If you're ever unsure whether your exposure is correct or not, always err on the dark side. A slightly underexposed photo is better than an overexposed one.
Here's another way to do this that will work on some cameras, including the iPhone: try tapping on different parts of the screen before taking a photo to focus on different parts of the scene. If your camera supports the feature and has it enabled, tapping will adjust the exposure depending on what you tap on. For example, if you tap on a very bright part of the image, the exposure will get darker, and if you tap on a very dark part of the image, the exposure will get brighter. If you're taking a photo of a still-life setup, you probably have a whole range of values from very dark to very bright in your painting, so you can try tapping different parts of your painting until the exposure is correct.
On many cameras, wherever you tap, the camera may focus on that spot. This means if you tap on the background of you still life, any objects in the front of your still life may be "out of focus" (blurry) and vice versa. If your background is a little out of focus, that's usually okay, but your objects should be in sharp focus.
METHOD 2: Exposure Compensation Controls
Some cameras (and camera-phone apps) have an "Exposure Compensation" control which allows you to adjust the exposure directly. The control is usually labeled with the icon ![]() or the abbreviation "EV" (short for "Exposure Value"). Usually this control is limited, only allowing you to adjust the exposure by a few increments, so you may need to combine this method with Method 1, depending on your camera. However, if you do have access to this control, it may be all you need to obtain the correct exposure.
or the abbreviation "EV" (short for "Exposure Value"). Usually this control is limited, only allowing you to adjust the exposure by a few increments, so you may need to combine this method with Method 1, depending on your camera. However, if you do have access to this control, it may be all you need to obtain the correct exposure.
If you're using an Android phone and your default camera app does not have an Exposure Compensation control, there is a great camera app you can download for a few dollars that usually solves this problem. The app is called Camera FV-5 and you can find it in the Google Play Store. While not all camera phones allow the app to control all of the camera features, Exposure Compensation usually works. With Camera FV-5, you can control the Exposure Compensation by clicking the ![]() icon or by dragging the little red bar in the bottom-corner of the screen to the left or to the right.
icon or by dragging the little red bar in the bottom-corner of the screen to the left or to the right.
There is a free version of the app, called Camera FV-5 Lite, which you can use to see if the app works on your phone without spending any money. The Lite version is exactly the same as the full version except the photos it takes are too small. The full version can take photos that are as large as your camera phone will allow, which you will need. Remember, you should not paint from small photos, and while you will be enlarging the image later when you print the photo, if you enlarge a photo that was too small to begin with, the print quality will be too low to use. So do not use the free Lite version to actually take your photos — you will need to purchase the full version.
Other Important Considerations
When taking photos with a camera phone, turn the screen brightness up to maximum. This will make it easier to avoid overexposing your photo.
Never ever use the flash on your camera when taking a photo to paint from. The flash function is usually labeled with the ![]() icon. Make sure to disable it.
icon. Make sure to disable it.
If you're using a camera without a moving lens (this applies to almost all camera phones), do not zoom in when taking the photo. Stay zoomed out all the way. Cameras without a moving lens cannot truly "zoom". Instead, they have a "digital zoom" feature which merely crops the image, making it smaller or degrading the quality. If your still-life setup is not taking up most of the photo and you would like it to be bigger, you need to move closer to the still life.
If your photos are coming out blurry, it may be that your still life was out of focus when you took the photo, but there are other possibilities. With camera phones, it's common for the piece of glass that covers the lens to get dirty or oily from being handled. Before taking your photo, breath hot air onto the lens cover and wipe it with a soft cloth (I use my shirt), the same way people clean eye glasses. Another common problem is motion blur if you're not holding the camera still enough when taking the photo. Try holding the camera as still as possible. Ideally, use a tripod or even a small table and a stack of books so that your camera is not affected by shakey hands.
If your photos are coming out too small, be sure to check the image size setting on your camera. It should be at the maximum quality/size setting.
Problems with Color Shifts
If the overall color of your photo is wrong (for example, if it's too blue or too orange, like the images below), this probably means your "White Balance" setting is wrong.
While this can easily be fixed in RAW photos from a manual camera, many automatic cameras don't have adequate controls for this, so you may not be able to do anything about it with your camera without getting into more advanced techniques.
If your camera or camera-phone app has a White Balance setting, it is usually labeled "WB", although sometimes other icons are used. The default setting is "Automatic", which may be abbreviated "AWB" or "Auto". While taking your photo, try changing this setting to the other options offered and choose the one you judge to have the most accurate colors overall.
A full explanation of White Balance and how to use to it is beyond the scope of this simplified walkthrough. For more information, read the Advanced Photography Guide.
Printing Your Photograph
If you have a printer that can print on glossy photo paper, you can print your photo yourself. It's normal for prints to come out looking differently than they did on your computer screen. Be sure to take prints into your studio (which should be lit with 5000k lights, as recommended on the Getting Ready for the Course page) before making any judgments about how the print turned out. Don't hold the photo next to the computer monitor and expect them to look the same. If your print needs to be adjusted (and it probably will), you may need to do that in your photo-processing software. If the issue is one of exposure, you can try retaking the photo to fix the problem. For example, if your print looks a little overexposed, try taking another photo with a darker exposure. If you're unsure, always err on the side of a darker exposure.
If you're having your prints made at a store, tell the person printing your photo not to make any changes or do any processing to the image if possible. If you receive your print and it's too bright, ask them if they can give you a really dark version, and then trial-and-error your way through it until you have a good print. If you're painting life-size, as recommended on the Choosing Your Subject page of the Online course, you will then need to have them adjust the print size (again using trial-and-error if necessary).
Whichever method you use, remember that the simplified walkthrough on this page is intended to give you "good enough" results for the purposes of learning to paint. For the purposes of creating great artwork in the long run, you ideally want your prints to be as close to "real life" as possible, and to do that properly, you will need to use the Advanced Photography Guide instead. Following the advanced guide may take an investment of time, effort, and money (for the equipment), but I strongly recommend making those investments if you plan to paint from photos on a regular basis.
If you would like information on taking photographs of a painting, click here.