How to Paint What You See
Before we begin, watch Part 3 of "How to Paint Realism" below. If you do not have the video, you can either purchase it by clicking the video below, or you can watch my free YouTube video "How to Paint in Oil" by clicking here. The free video covers the entire painting process, it just does not demonstrate beyond painting a single silver cup.
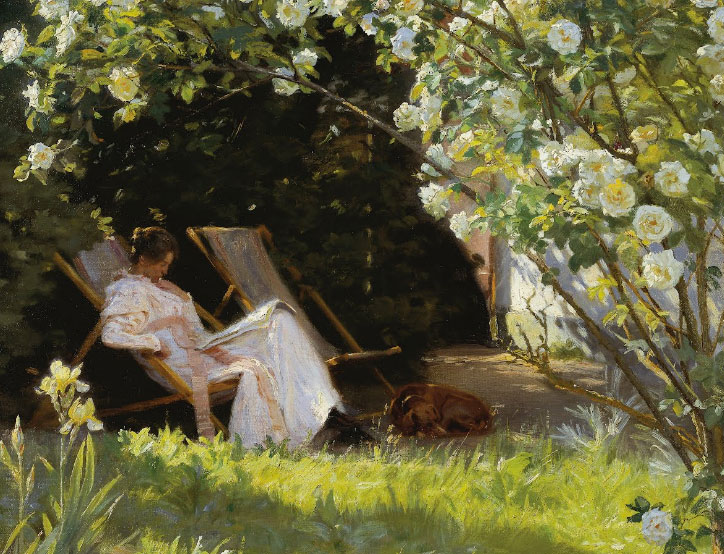
After you watch the video, also take some time to go through the interactive timelapse of me painting the "yellow flowers" still-life, even if you have looked through it before. Make special note of how I lay in each step one by one, finishing each step before going on to the next.
Once you have reviewed the interactive timelapse and have finished watching Part 3 of "How to Paint Realism", continue reading below. Do not start painting until you have read this entire page!
Paint One Object at a Time
In most cases I paint one object at time. That means I completely finish whichever object I am working on before going on to another object. This does not mean I will not come back to it and make adjustments later when the still life is finished, but I do try to finish one object completely before moving on — and I usually never come back and work on it again.
It is too much to try and focus on more than one object at a time. The other advantage to painting one object at a time is that if your paint is drying or getting sticky, you can let it all dry and then continue later with fresh paint. This is much harder to do if you have objects which dried when they were only half-painted.
This is one of many reasons I recommend that you paint in some background color first around whichever object you are painting. That way if your paint does dry on canvas, you can very easily blend into the dry background colors to re-wet those areas and continue with your still life.
Rules for Covering your Canvas with Paint
These rules mainly apply to how you lay in your color until your canvas is completely covered in particular area. After you have covered the canvas of the object you are painting, at that point you will change your approach to painting and some of these rules may then be broken. I will cover that later in the "Once Your Canvas is Covered" section at the bottom of this page.
Do Not Blend
This is rule number one. It is the hardest to follow and it is also the one that is most important. I can not teach you to paint if you blend and "fix" as you go. You must learn to paint in a stroke and then leave it alone.
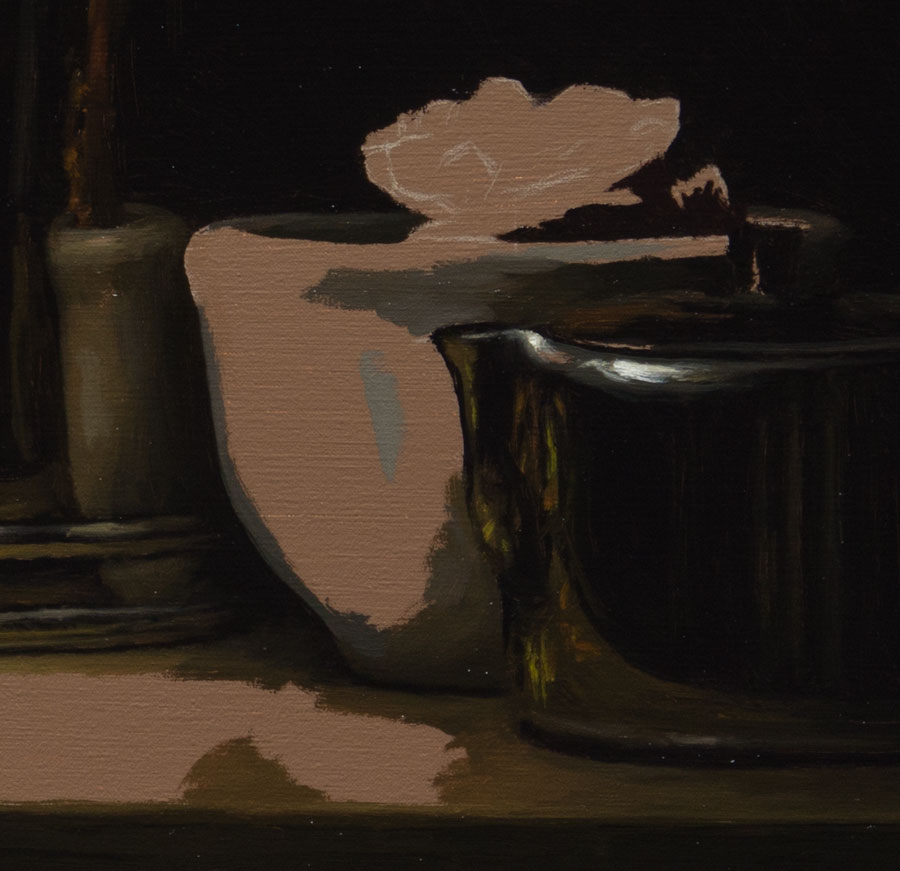
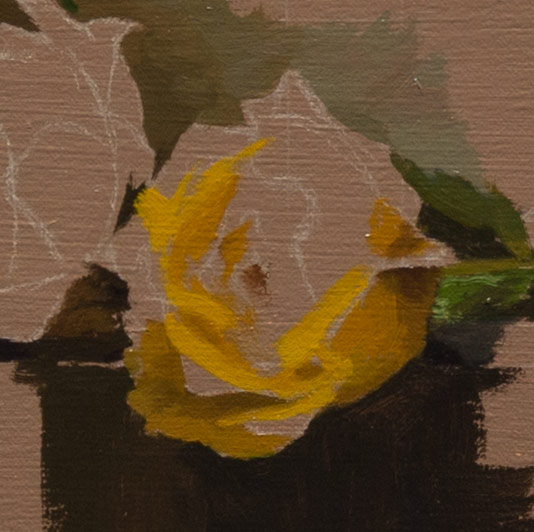
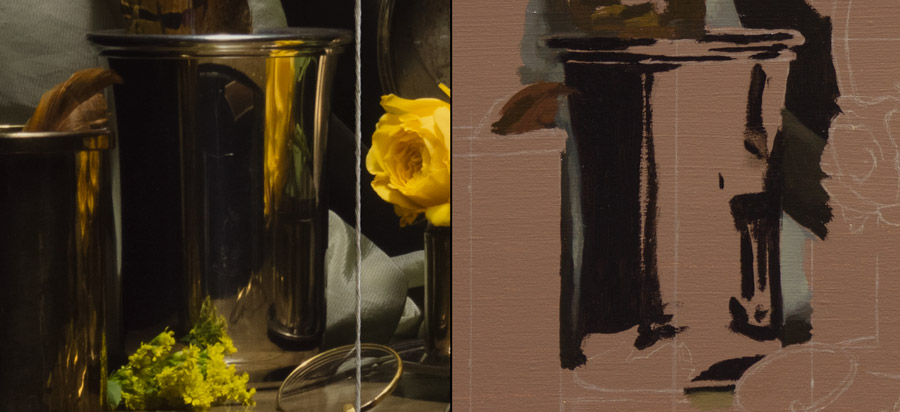
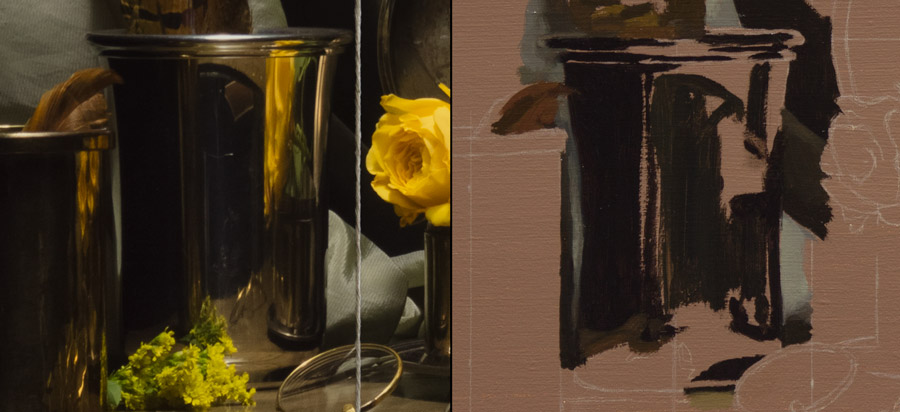
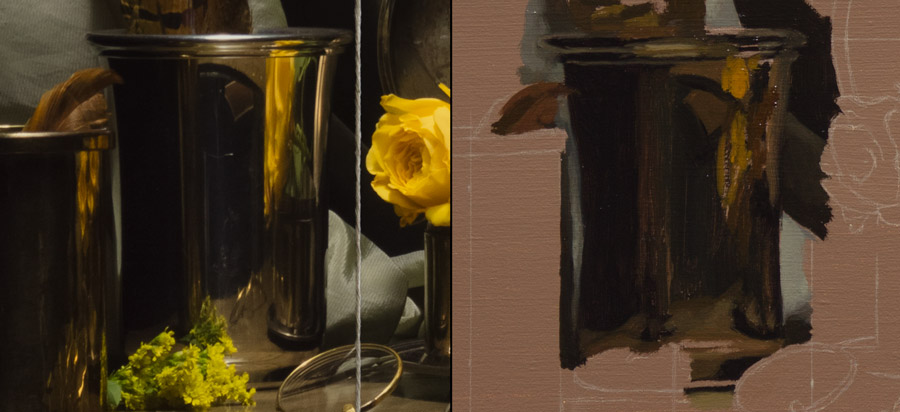
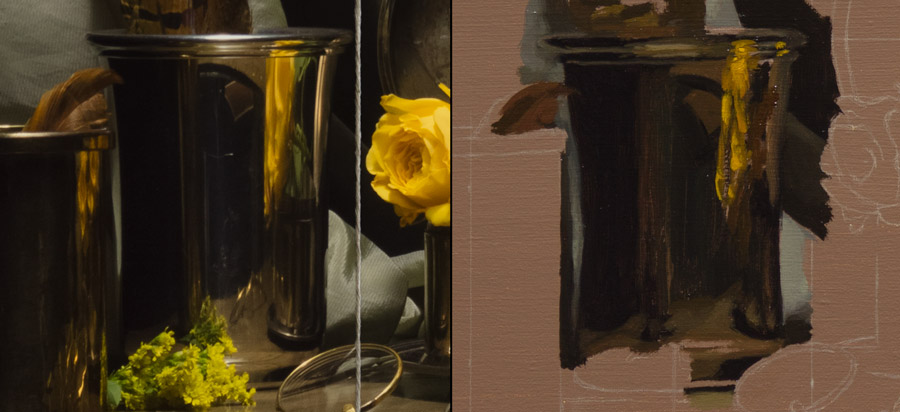
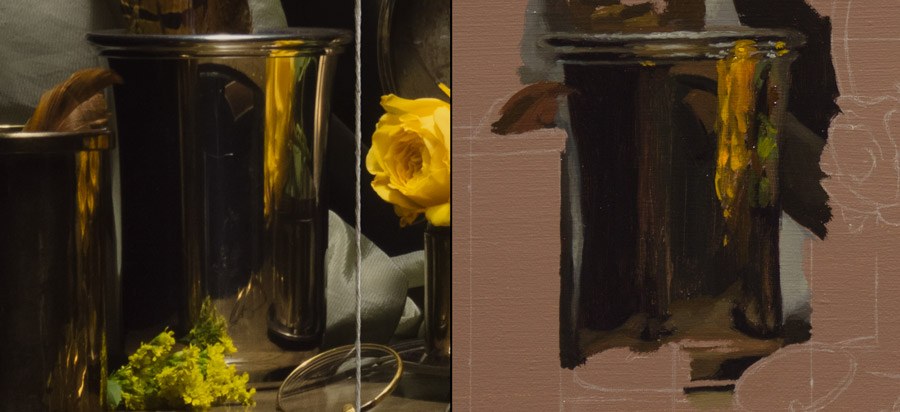
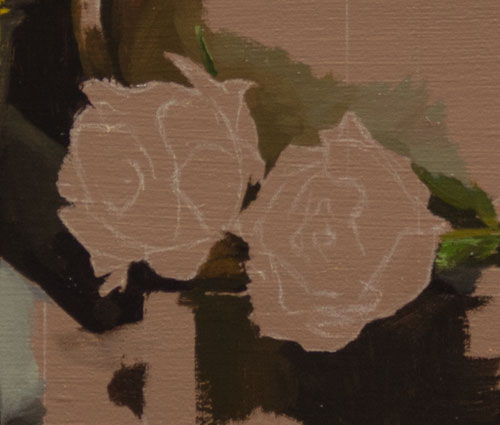
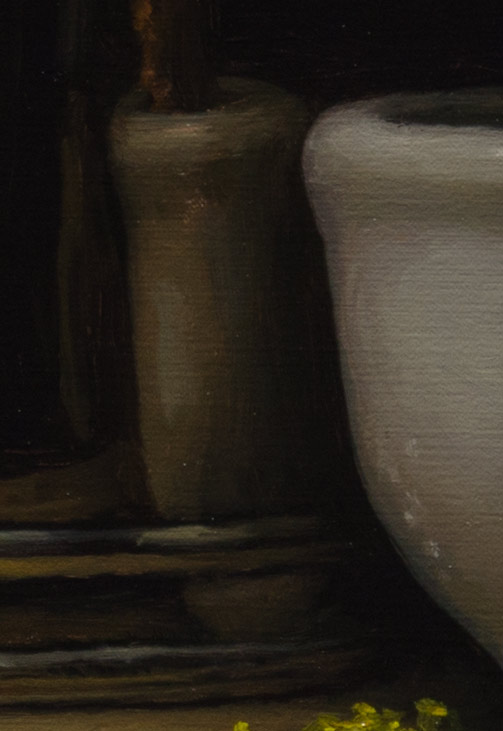
Until you get all of your steps painted and the canvas completely covered you can not and should not even attempt to try and make judgements about what is wrong with your painting. A half-painted vase (or anything else) will always look completely wrong. Take a look at these half painted objects and notice how wrong they look, and yet I have painted them correctly up to this point.
Another reason to avoid blending is because it is the surest way to ruin your color. A single blending stroke across a shadow will turn it from a rich natural color to a milky out-of-place color. And you won't even know it happened — in fact you will probably think it helps, because your canvas is bare all around it. Watch this video below where I discuss protecting your shadows.
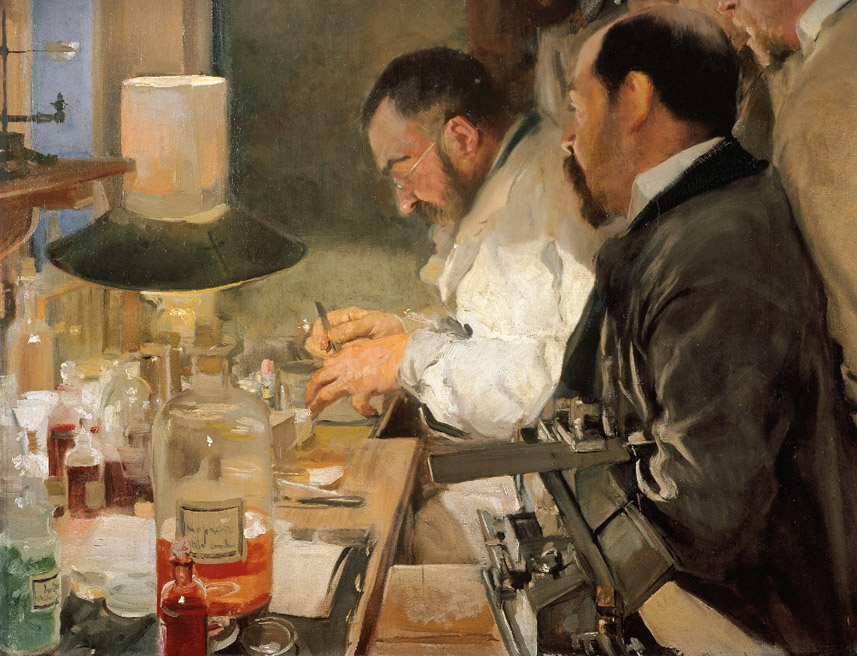
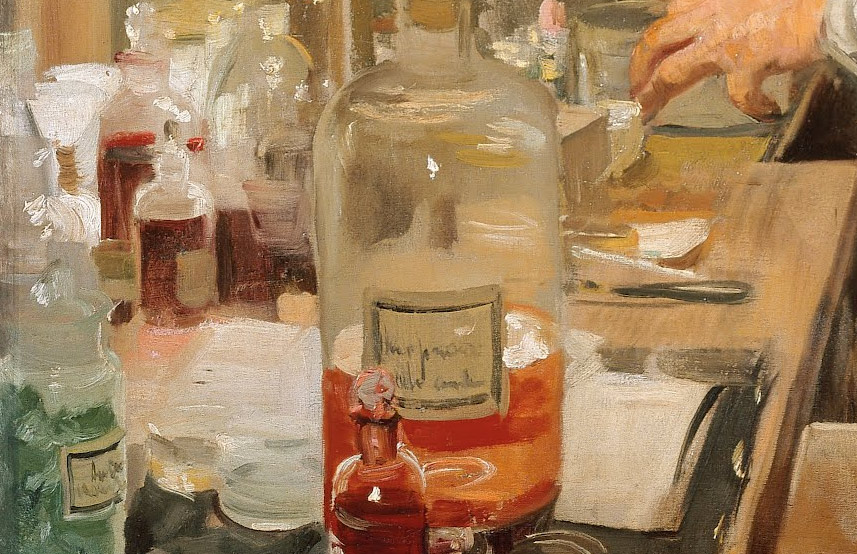
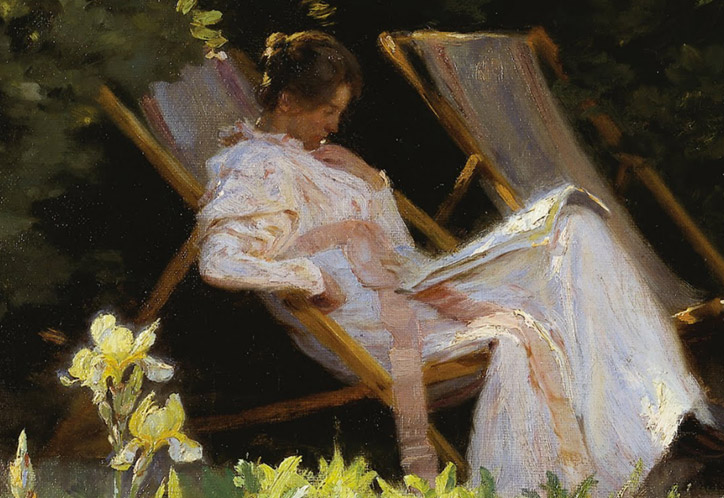
There is one more reason not to blend and this one is less obvious. Unblended color is "yummy" color. I don't know how else to put it. Up close when you are sitting at your easel it may look like "yuk", but step back and it looks natural and wonderful. Smooth blended color looks artificial. Notice in the images below, that when you look at the detail up close, these classic paintings do not have all their colors blended together.
Do Not Exaggerate
Trust your color checking. When you check a color, ask yourself how far to the left does the color go? How far to the right? How far down? How far up? Then paint it in accordingly. Don't make assumptions. Most people do.
Do not think you know better than your color checking. Resist the temptation to exaggerate what you see. Do not make the glow in the bottom of the vase brighter. Do not make the reflection lines stand out on the table more. Do not make your painting have more "pop". Amateur artists love to over-paint everything — don't do it. Simply trust your color checking, and re-check a color if you need to. Don't "let yourself go" and start playing with your paint. It is so much fun to exaggerate everything you see, but it will make your work look amateurish and unnatural in the end.
Take a look at this blog post where I talk about two essential qualities in good realism — not exaggerating things is one of them: Two Essential Qualities of Good Realism
Paint From Dark to Light
Do not jump around. It is easier to see your object develop if you paint in the darkest colors first, and then move on to the next value, and then the next, and so on. Take a look at the images below and note how you can see the object develop because I painted it in order from darks to lights.


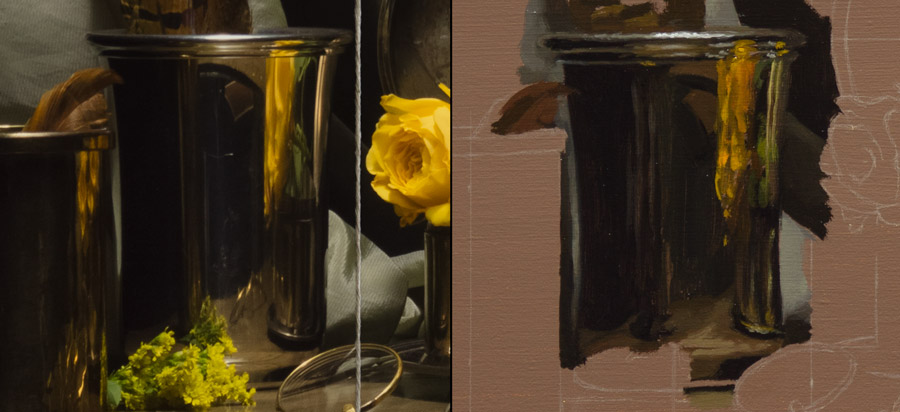
The other reason I paint from dark to light is because it is much easier to paint a lighter color into a darker color than the other way around. Trying to paint a shadow into a lighter color is very difficult to do without milking up your paint.
Paint in Some Background
Painting in a bit of background around your object will help you see your edges better. If you just paint an object on the canvas with no other paint around it, your edges will look completely wrong even when they are right.
The other thing it does is allow you to "bump" your lines around if you need to by "pushing" your lines back with the background color.
Over-Paint Your Darks
Over-paint your darks, but do not over paint your lights. Read this blog post where I discuss this issue: Two Most Common Mistakes When Checking Colors
Take a look at the reflection of the white bowl in the image below.
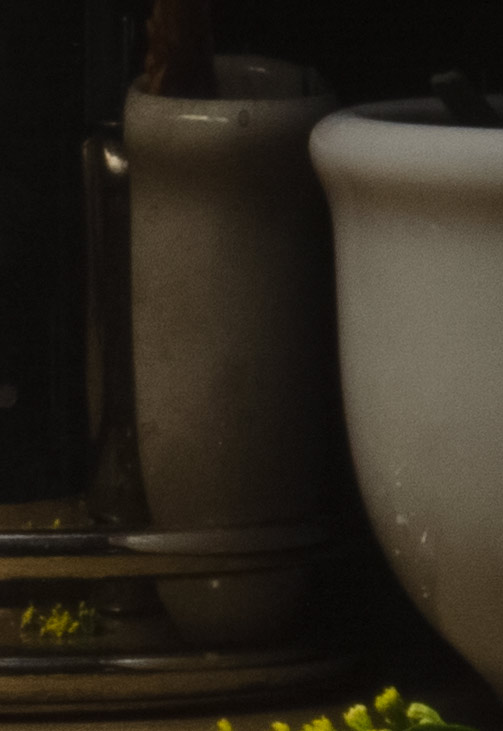
When you check your color, the tendency for most people would be to check the color in the center of reflection where I have placed black dots in the image below.

But look what happens if I then "paint in" that color over the area in the reflection where it looks like it belongs.
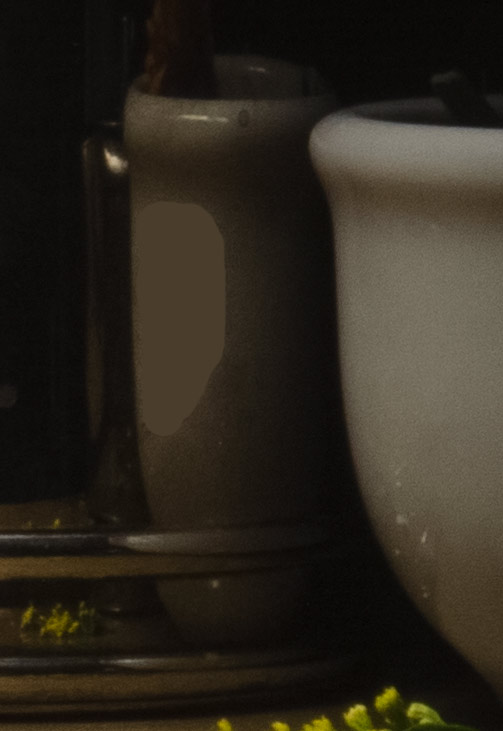
So instead, you should check the color around the outside of the reflection where I have placed the black dots in the image below.
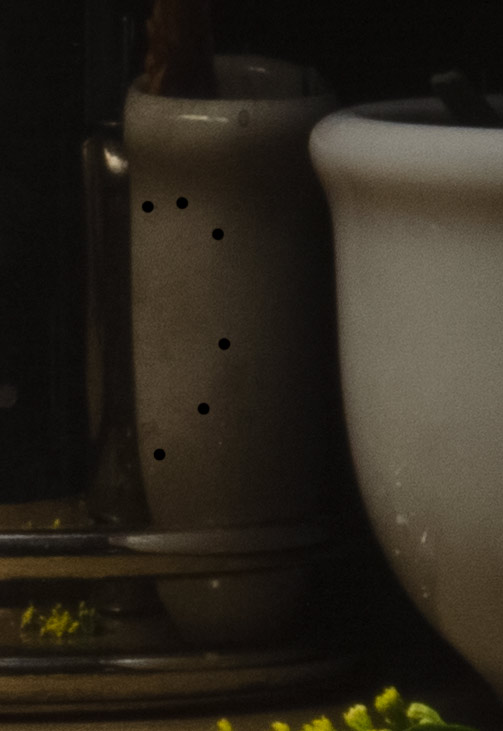
Paint in that darker color first and then — and only then — paint a small spot more in the middle as I have done in my painting.
So as you paint your still life it is always best to over-paint your darks instead of over-painting your lights. When you paint in a step, paint it slightly beyond where it goes, knowing that when you paint the next lighter step, you will push it back a little.
Paint Ugly
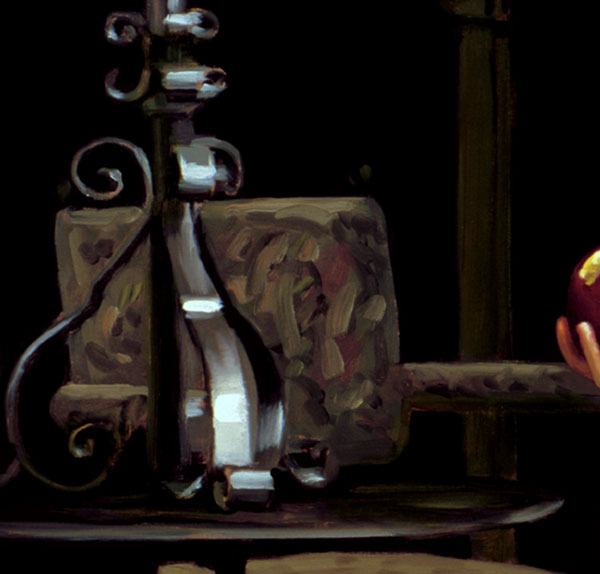
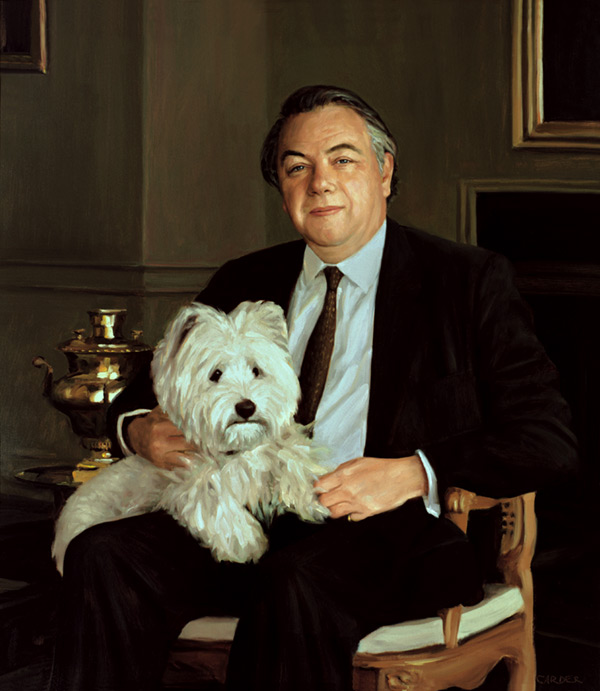
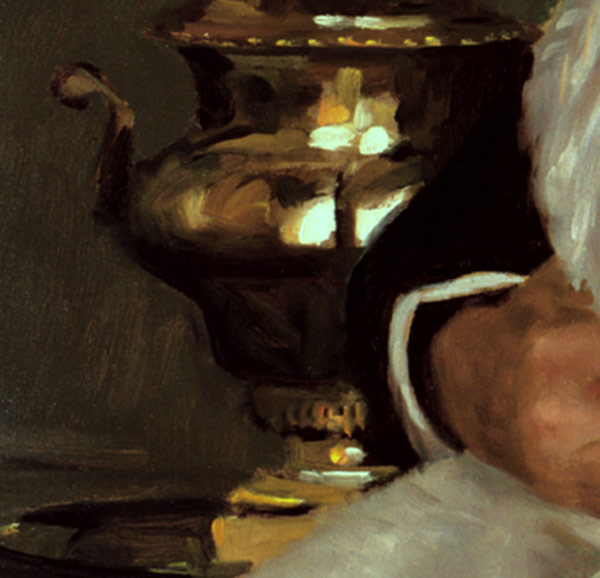
Up close when you are at your easel, your paint will look ugly, messy, and jumbled up. From a distance all that jumble makes the color dance and the surface seem "touchable". Smooth blended paint from a distance looks artificial.
These images from a couple of my portraits illustrate this point:
Do Not Paint "Better" Than Your Source
This rule is similar to the "Do Not Exaggerate" rule above. Never look at your work in progress and start to fall in love with your brushwork, or some interesting color you inadvertently painted in. In this course, our goal is to paint what we see. After you have learned to paint well, that is a different matter entirely — I am not at all against artists using their imaginations when they paint. But in this course, as you are learning to see color and to paint, it is very important that you paint exactly what you see.
Don't try to improve on your source, trust your color checking!
Use Enough Paint
Paint with a brush full of paint, but not so much that you are creating reflections and glare spots in the paint surface. And never try to paint with too little paint in your brush. Trying to paint by rubbing paint on the canvas with your brush is not painting — the color will be different if the canvas is showing through. A little canvas showing through is fine, but make sure you brush is full of paint so your colors stay true.
Take All the Time You Need
Go slow. You are learning a method, and rushing or taking shortcuts will only make it more difficult in the end. Once you paint a couple of paintings you will naturally begin to speed up. Before long it will all be second nature.
And after you have painted with the method for a year or two, you can leave the method behind and paint however you wish — because you will know how to see, draw, and paint. At that point you will naturally avoid the mistakes that are very easy to make when you're still training yourself.
Once Your Canvas is Covered
Once you have finished laying in all your color and you have finished covering the canvas for the object you are working on, at that point you will completely change your approach to painting.
Where before I told you to trust your color checking and to never trust your eye, now you should trust your eye. It's important not to do this this until your canvas is covered! But once your canvas is covered, it's time to ask yourself "what is the difference?" Where before you could not trust your eye because of the blank canvas, now even a first-time painter can see differences easily. For example, in this side-by-side image, you can probably find lots of little differences between the painted object and the actual object.
"What is the Difference?"
Once you have covered all the canvas with paint, and the darkest shadows as well as the brightest highlights have all been painted in — no bare canvas is showing — at that point (and not before) you are ready to start asking yourself "what is the difference?"
These are the kinds of questions you will ask yourself:
- Which is more subtle: the reflection in the vase in my painting, or the reflection in the real vase?
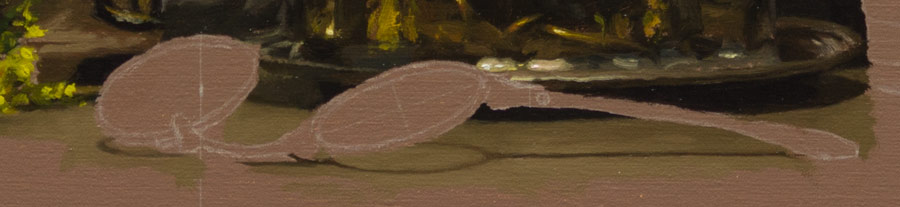
- Which is steeper: the angle on the edge of the eye glasses in my painting, or the angle on the edge of the real glasses?
- Which are fatter: the horizontal lines in the table reflections in my painting, or are the real reflections fatter?
The list is endless. Look for the small (or large) differences and then fix them one by one. If you need help with this part, post of a photo of your progress on the Draw Mix Paint Forum and someone will be happy to help!
Knowing When to Call It Finished
Do not overwork your painting. Stop sooner rather than later. Leave color unblended completely if that suits you. The more you work your paint — the more you blend and "fix" — the easier it is to ruin your color, especially the shadows. Instead of looking at the canvas from your painting position, step back every once in a while and look at the painting from further away.
Judging Your Subject
When you are choosing your subject and composition, you should work at it and give it lots of thought and consideration. Spend a few days or more deciding what to paint and exploring your ideas… then pick your favorite from fifty choices. Work hard at it.
But once you decide you really like something and begin to work on it, from that point on never second-guess whether you like it or not. As you work on it — drawing, color mixing, and especially painting — you will very likely grow tired of it. It always happens to me. By picking it apart and working on it for hours, it will no longer create the spark it did when you first saw it and decided you really liked it.
Remember, when people see your painting, they will be seeing the composition for the first time. It is very, very different! I wish I could walk into a room and view my own painting having never seen it before. But of course that will never happen. We have to accept this.
next step →